A Witch's Guide to Tanning Hides This is the fifth post in a series on Working with Zoological Remains. This series is focused upon the use of zoological remains -the preserved remains of animals- in witchcraft and has explored the ideology as well as the practical aspects. Previous posts include An Introduction to Working with Zoological Remains, Bone Collecting: How-to Acquire Bones and Other Zoological Remains Regardless of Where you Live, Of Skull & Bone: Cleaning & Whitening, and The Joy of a Salt Box: Preparing Wing & Paw. The final post of this series shall focus on actual usage. For now, we will be looking at various ways to tan hides and make leather at home. Due to length, this will be a 3-part post. Tanned animal hides and leather are versatile items in witchcraft with a range of uses that vary from extremely practical (e.g. using to make bags, jewelry, clothing, or altar clothes) to very spiritual (e.g. being used to connect with the spirit of the animal whose hide it is, to connect with the archetypal energy of that species of animal, and/or to connect with another spirit or deity Who is connected to that type of animal, amongst others.) Of all preservation methods, with the exception of taxidermy and creating full body mounts, this is the most complicated. However, this is only because the number of steps is considerably greater and deviating too far from the prescribed steps can lead to disaster -in this case, rotting hides, hides that hair falls out in large patches, and hides and leather that smell bad. To help ensure the greatest amount of success, alternative steps and techniques will be given where appropriate. Advance apologies that this post will be lacking in photos of the tanning process. I did not think to take pictures the last time I tanned a hide and as there’s a few inches of snow on the ground (despite it being early April) and I’m 7 months pregnant, I’m not going to be tanning anything again till mid-Autumn at the soonest. As this post will be rather long, for ease of navigation it will be divided into the following sections, with each section preceding as if you have a green hide:
First, a few important terms: Green hide: this is a raw animal hide. This is what you have immediately after skinning an animal. The hair is still attached to the skin and there will be bits of flesh and tissue on the underside. Fleshing: this is the process whereby any remaining fat and tissue is removed from the hide. It’s an important step as remaining fat will begin to rot, creating an acid that will burn the hide. Dehairing: this is the process whereby the hair is removed from the hide, rendering it skin This is done as part of making rawhide and leather. Dressing: also called fur dressing. This step is where the hide or skin is softened; there are a variety of ways to do so. Primitive methods will first condition the hide using animal brains (as will be outlined below,) egg yolk, and even olive oil. Once conditioned, the hide or skin will be furthered softened by running a rough rope across it, rubbing a stick across it, or running a dull scraper across it. Suggested methods will be provided with the two tanning methods below. Tanning: this is the process by which the hide or skin is preserved. This is what makes the difference between leather and rawhide, as both undergo fleshing and dehairing. However, when gotten wet, rawhide will return to a raw state, whereby it could be tanned, and leather will just be damp. Hide vs Skin: Hide is typically used to refer to a skin with the hair intact, skin will be used to refer to a dehaired hide up until it is tanned (then it is leather) or dried (then it is rawhide.) Slipping: aka slippage, hair slipping; this refers to the hair falling off of the hide when it’s not supposed to. This can be caused by a number of reasons, from bacteria, improperly cleaned hides, to the wrong proportion of chemicals burning the hide, among others. If slipping occurs, the hide can still be saved by removing the rest of the hair and tanning the skin or turning it into rawhide. Skinning and FleshingIf you have the fortune to hunt, raise your own animals for food, or to come across an animal in nature that has very recently died, knowing how to properly skin an animal will help to ensure that you have a hide that is evenly shaped and with as much usable hide to work with as possible. There are variations in how to skin an animal based upon species and size; the best way to learn is in person with someone who has experience showing you what to do. It’s definitely one of those things that seems easy enough when reading about it until you’re standing there with a knife in one hand wondering why there’s suddenly green and yellow goo running everywhere (answer: you pressed too hard and punctured the intestines, bladder, and/or testes; work faster and finish now.) If you don’t know anyone who hunts and would be willing to teach you basic skinning technique, your best bet is to track down a few hunting books that will give you detailed steps with numerous pictures from different angles. I don’t particularly recommend an online search for this as I’ve yet to find an article that (I feel) has enough pictures to truly show just what needs to be done and how. Even then, you will learn best by doing as exact finger placement (in small game) and knife strokes (in larger game) is not something easily conveyed except in person. Expect your first hide to be rough, it truly takes hands on practice. Your next hide will look better. This is one of the most intimate parts of working with zoological remains, surpassed only by the act of hunting and guiding the spirit of that animal into the Otherworld. Yes, this can seem unpleasant and even gross, but if that is your mindset then you would do well to question why you have interest in working with zoological remains. This is not a practice that lends itself well to the commercialized magick so prevalent within the contemporary witchcraft community. It is raw, dirty, and unapologetic. If you can’t bring yourself to lovingly process an animal’s body in order to procure the tools necessary for your craft, then you may wish to stick to something safer, like candles and pewter wands. To work with zoological remains is to surrender to the very real way in which the world works, and in cleaning bones or tanning hides, you better align yourselves to that current and open yourself to new avenues of possibility not just in your witchcraft practice but in your general life, too. General Skinning Guidelines
General Fleshing Guidelines
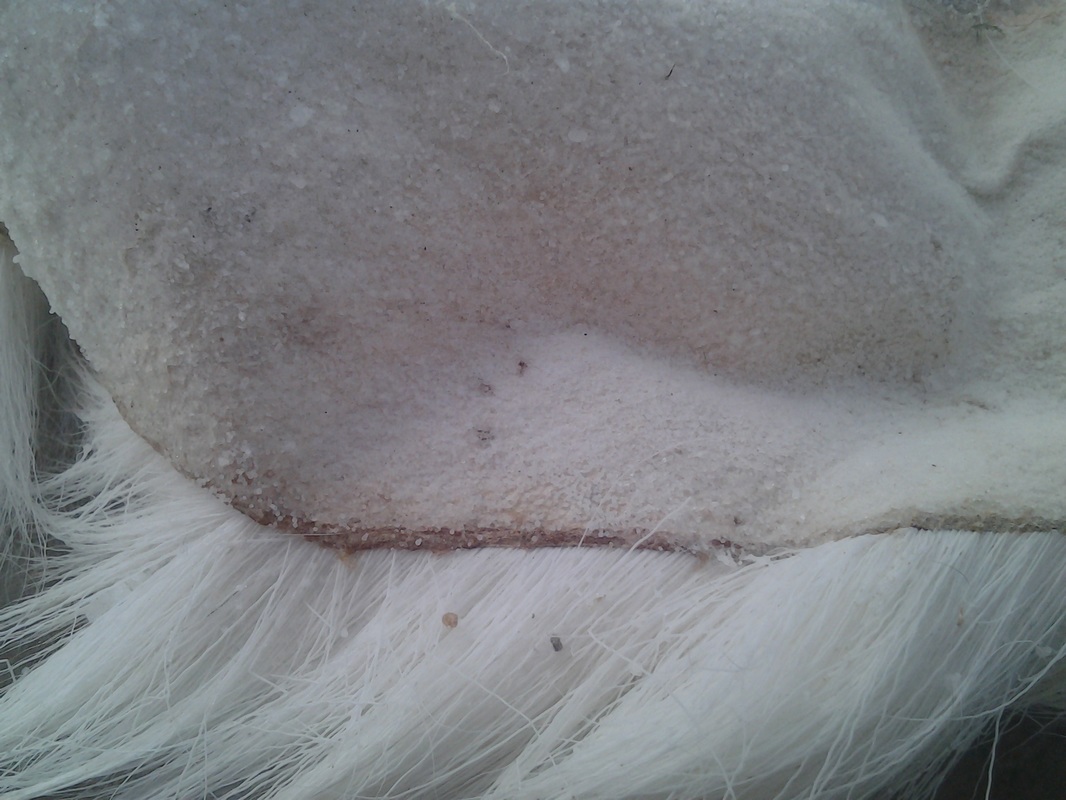
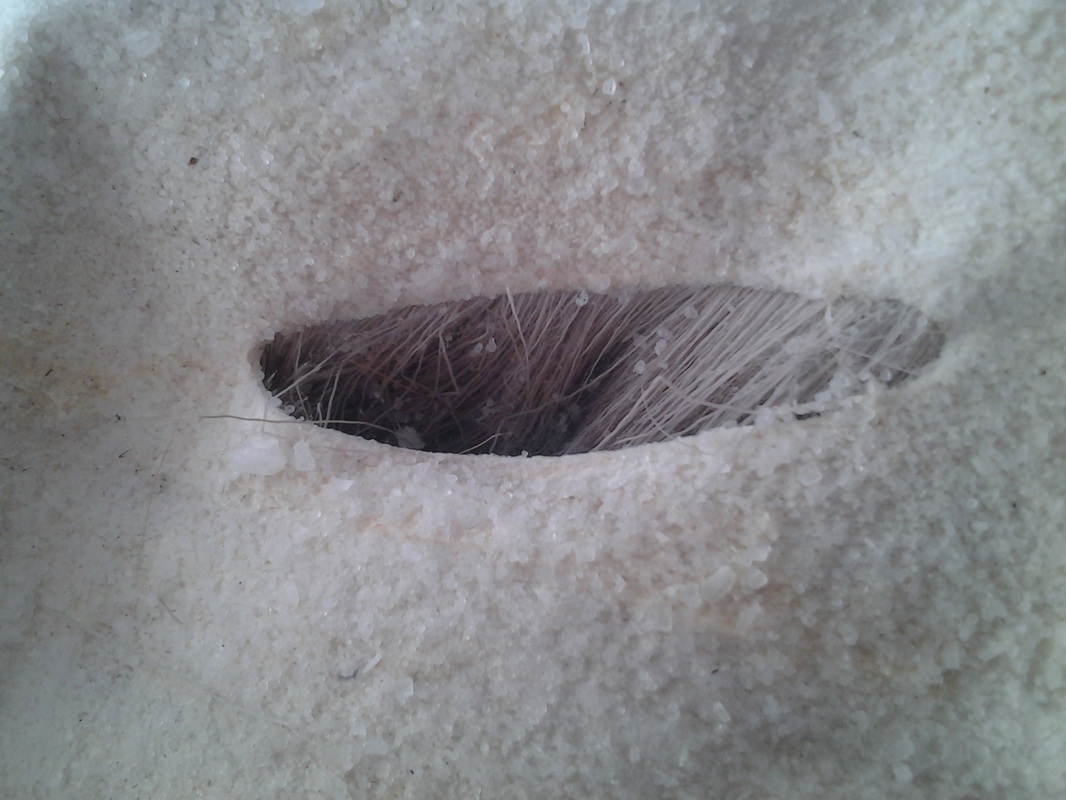
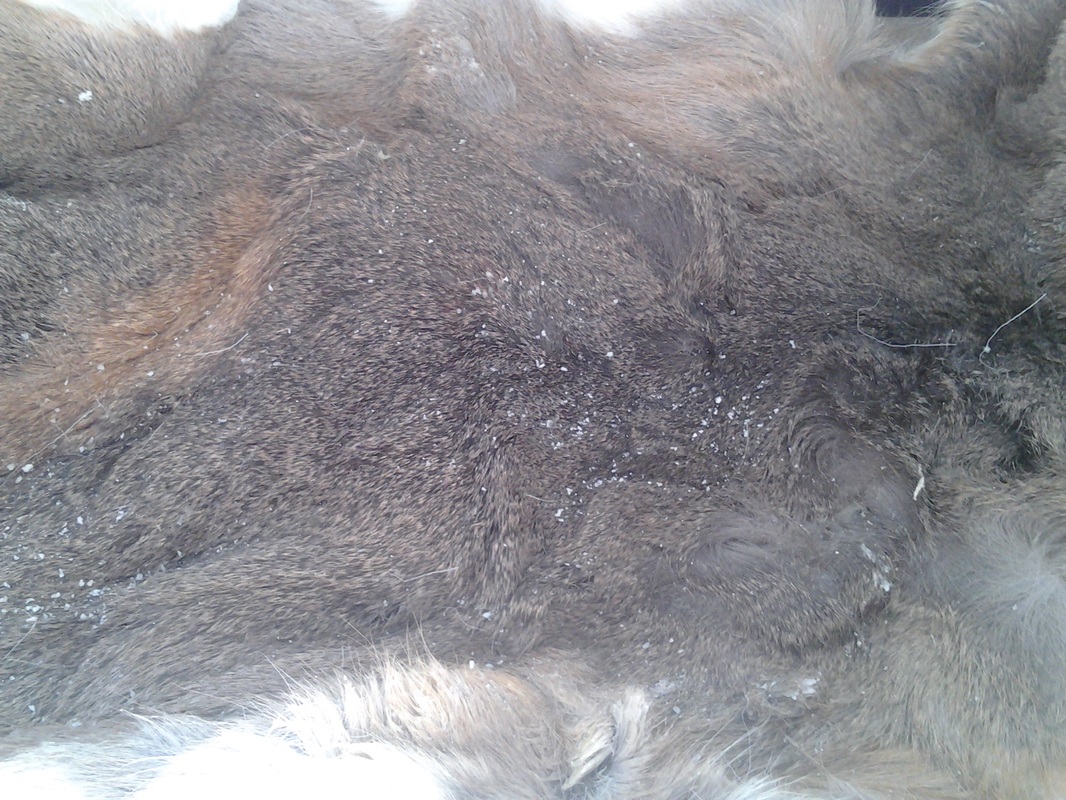
Preserving Hides for Later UseIt’s not uncommon to get ahold of a green hide and not have the time nor materials to immediately tan the hide. Rather than letting that precious hide go to waste, it’s really easy to preserve the hide until you have enough time to devote to tanning or until you acquire all of the materials you need. By far the easiest way is to freeze the hide. Once you have it fleshed, simply roll the hide up, place it into a plastic bag, close the bag, and place the hide in your freezer. When you’re ready to tan the hide, all you have to do is let the hide thaw out, unroll it, and follow the steps for tanning hides as outlined below. My preferred option is to salt hides. It works fairly quickly and allows you to store the hide anywhere, so long as it will stay dry and be in low humidity. Once you’ve fleshed the hide, lay the hide flat with the hair side down. It should be on a surface that won’t encourage the retention of moisture, as this will make the drying process take longer. Place a generous layer of salt onto the hide, making sure to cover every last bit. If you deboned the tail by pulling the hide off of the tail rather than slitting the hide of the tail up and peeling the hide off, you’ll want to pack the tail with salt. Every day until the hide is completely dry, empty the salt from the tail, allowing any fluid to drain out (this can happen with deer hides,) and pack it with new salt. Some people say to only use non-iodized salt, but my own experience has shown no difference in using iodized salt or non-iodized salt. In both cases, the hides dried just as quickly and with no visible differences in effect on the hide, both before and after tanning. Depending upon the size of the hide, it should take between two days and a week to thoroughly dry. You may need to pour more salt onto the hide in some places; this is usually the case with larger hides as there is much more moisture that must be pulled from the skin. The edges of the hide should be firm and crispy, while the entire hide will be fairly inflexible and hard. You’ll find that a good portion of the salt will remain stuck to the hide, this is fine. The excess salt can be poured off and saved for the next hides you dry, or it can be used in a salt box to dry wings and feet, as we covered in the previous post in this series. Hides can last for years preserved this way as long as they are kept dry. However, if you can’t conceivably properly preserve (i.e. tan) the hide within a couple of years of getting them, you may wish to consider realistically looking at the situation and consider a respectful disposal of the hides or gifting them to someone who can attend to them properly. This was the first of three parts focused on at home tanning methods. The next part will focus on tanning hides using battery acid, the third will focus on tanning hides with brains and smoke. This complete post is #5 of a 6-part series on Working with Zoological Remains. The final addition to this series will focus on the actual use of zoological remains in witchcraft, especially on working with the spirit of the animal that may remain with those carefully cleaned bones. Ready to Take it Further?
Comments are closed.
|
Throwing the Bones
Stay Connected

Archives
January 2023
|